Common problems and solutions in the dispensing process : a must-read for efficient production
In precision manufacturing fields such as electronics, automotive, and medical, the stability of the dispensing process directly determines product quality. However, various problems inevitably arise during the dispensing process due to factors such as adhesive characteristics, operating procedures, and equipment maintenance. This article summarizes six common problems in the dispensing process and provides professional solutions based on the structural features and technological advantages of Second Intelligent dispensing machines , helping companies quickly troubleshoot and improve production efficiency.
1.Abnormal dispensing amount (too much/too little ) :
Problem description : Excessive glue dispensing volume ( the volume of glue output in a single dispensing operation ) causes glue to overflow and contaminate the product; insufficient glue dispensing volume results in weak adhesion and product malfunction.
Main reasons: improper pressure settings, incorrect dispensing time parameters, mismatch between needle selection and glue viscosity, and unstable back pressure of the glue supply system.
Solution :
● Parameter calibration: Adjust the dispensing pressure according to the viscosity of the adhesive (for example, the pressure needs to be increased for high-viscosity silicone), and simultaneously fine-tune the dispensing time. It is recommended to use the principle of “small amplitude multiple tests” to determine the optimal value.
● Needle matching: Follow the principle of “needle inner diameter is 1/2 of glue dot diameter” for selection. For example, a 0.5mm glue dot corresponds to a 0.25mm inner diameter needle to avoid glue dispensing deviation due to needles that are too large or too small.
● System check: Check the pressure valve of the glue supply tank to ensure that the back pressure is stable (usually maintained at 0.05-0.1MPa) and eliminate pressure fluctuations caused by air leaks in the air pipe.

Figure 1. Various dispensing needles from Second Intelligent
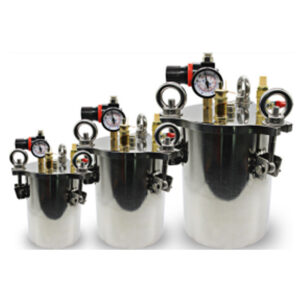
Figure 2. Second Intelligent Pressure Tank
2.Stringing phenomenon :
Problem description : When the dispensing head leaves the workpiece, the glue forms a continuous fine thread that remains on the product surface or the dispensing head, affecting the appearance and subsequent processes.
Main reasons: high glue viscosity, improper glue shut-off delay setting, insufficient stringing height ( the distance the dispensing head rises after dispensing until the glue breaks naturally ) , unstable air pressure, or worn needle.
Solution :
●Adhesive optimization: High-viscosity adhesives can have their viscosity reduced using Second Intelligent’s dedicated heating module, or by adding a special thinner.
- Parameter adjustment: Set the glue-off delay (10-30ms) to ensure that the glue flows out completely before closing the glue valve; increase the stringing height from the default value by 1-3mm, and use the “diagonal pull and lift” action (angle 15-30°) to break the glue.
- Equipment maintenance: Replace worn needles, and regularly clean the needles and glue valves with a special solvent to remove residual cured glue.
- Turn on the equipment’s air pressure stabilization function to control the air pressure between 0.3 and 0.5 MPa to avoid air pressure fluctuations.
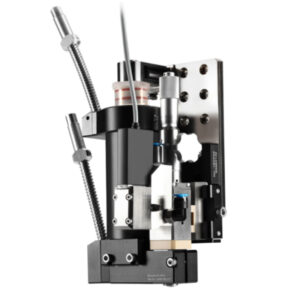
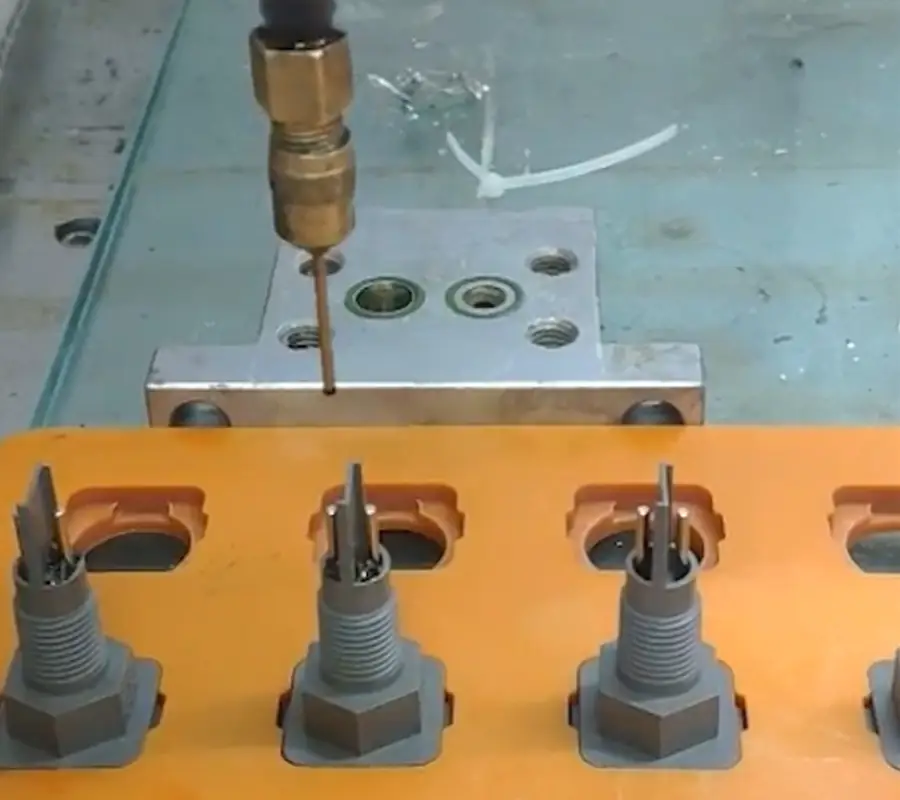
Figure 3. Pneumatic hot melt spraying assembly
3.Bubble generation:
Problem description : Hollow cavities with a diameter of ≥0.1mm appear inside or on the surface of the adhesive layer after dispensing, including dynamic bubbles generated at the moment of dispensing, static bubbles that precipitate when the adhesive is left to stand, and bubbles that expand during the curing process.
Main reasons: Improper production, transportation , storage, or mixing methods; malfunction of the equipment’s glue supply system; unreasonable dispensing parameter settings.
Solution :
● Before using adhesives, for adhesives that do not contain volatile components, a vacuum degassing machine can be used. To mix two-component adhesives, the static mixing tube of the Second Intelligentmachine should be used first. If manual mixing is necessary, the “slow clockwise stirring” method should be used, with the stirring speed controlled between 30 and 50 rpm. Let the mixture stand for 5 to 10 minutes after stirring before use.
● Once opened, tighten the cap promptly when using no more than half the container capacity. Unused adhesive should be sealed and stored in a cool, dry place for no more than 80% of its shelf life. Before replacing with a new adhesive container, clean the adhesive supply line connections to prevent old adhesive residue from mixing with the new adhesive and creating air bubbles.
● Before starting the machine each day, check the glue supply line (from the glue tank to the needle) for damage or bends, ensure the joints are tightened, and check for deformation or leakage of the seals . Regularly maintain the glue pump: clean the residual glue inside the pump body, check the wear of the pump core and gears, and replace the pump core in time if the wear exceeds 0.1mm. Calibrate the glue pump pressure to ensure that the glue supply pressure fluctuation range is ≤±0.02MPa.
● Select the appropriate needle and dispensing pressure according to the viscosity of the adhesive ; keep the liquid level in the glue tank between 1/2 and 2/3 to avoid the liquid level being too low; adjust the pressure of the glue tank according to the characteristics of the adhesive, usually controlled between 0.02 and 0.05 MPa, refer to the equipment operation manual for details .
● The dispensing speed should be set according to the principle of “slower for higher viscosity, faster for lower viscosity”: 5-10 mm/s for viscosity ≤ 5000 cP; 2-5 mm/s for viscosity 5000-20000 cP; and 1-2 mm/s for viscosity > 20000 cP. Adjust the speed according to the complexity of the dispensing trajectory, appropriately reducing the speed at corners. Set the dispensing delay to 0.1-0.3 seconds, determined through trial dispensing to ensure no trailing or air bubbles in the dispensed area when the needle leaves. Set the distance between the needle and the workpiece to 1-1.5 times the needle’s inner diameter; for example, when using a 0.5mm inner diameter needle, control the distance between 0.5-0.75mm. Adjust precisely using the equipment’s “teach mode” to ensure uniform spacing.
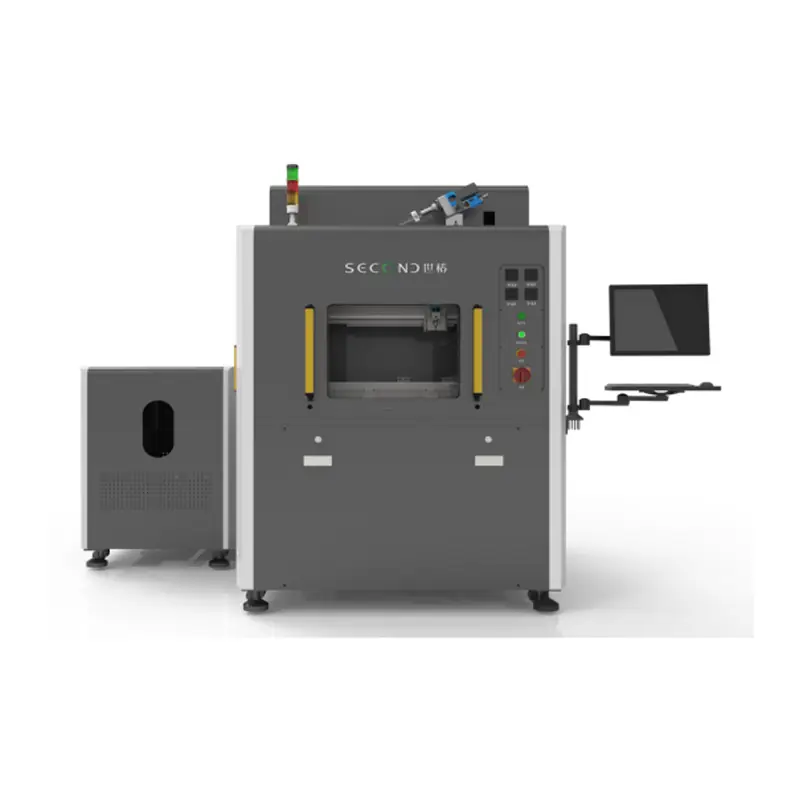
Figure 4. Vacuum dispensing machine SEC-S400-Z/ZH
4.Clogged nozzle :
Problem description : Interruption of glue dispensing or a sudden decrease in glue dispensing volume; glue hardening and clumping visible at the needle tip; equipment reports “glue supply abnormality” alarm.
Main reasons: prolonged curing of the adhesive, incomplete cleaning of the adhesive supply line, and environmental dust entering the nozzle.
Solution :
● Emergency treatment: Disassemble the needle and soak it in the corresponding solvent (such as isopropanol for UV adhesives and ethyl acetate for epoxy adhesives) for 10-15 minutes. Use a needle to clear the inner diameter of the needle. Do not strike it violently.
● Precautions: After each day’s work, perform the “pipeline cleaning” procedure to remove residual glue using the equipment’s built-in cleaning function; if the machine is shut down for more than 2 hours, close the glue supply valve and seal the needle, or replace it with a temporary protective needle.
● Environmental control: Keep the work area clean and install an air filter at the dispensing machine inlet to prevent dust from entering.
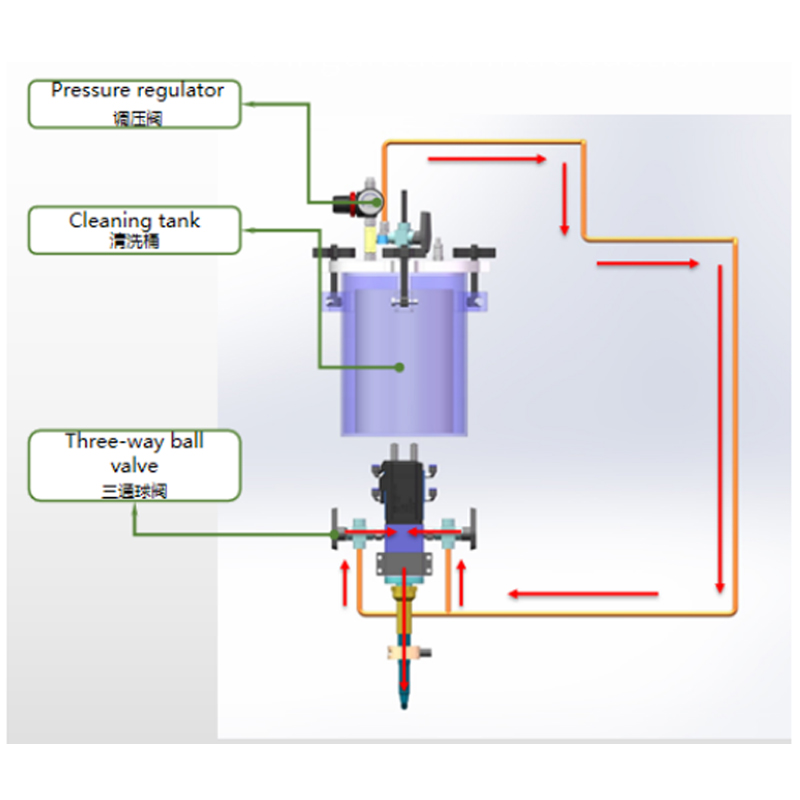
Figure 4. Cleaning tank
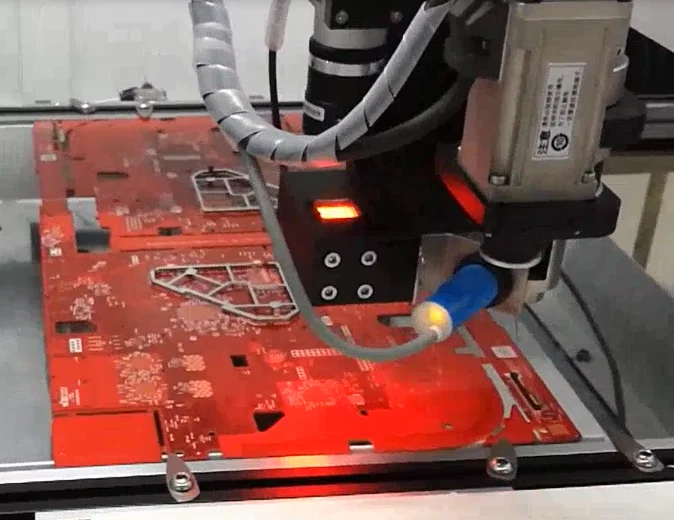
5.Inaccurate positioning:
Problem description : If the adhesive dots deviate from the preset coordinates and exceed the product’s dispensing area, it can lead to bonding failure or appearance defects.
Main reasons: uncalibrated vision positioning system, uneven worktable surface, loose screws in the transmission mechanism, and worn workpiece positioning fixture.
Solution :
● System calibration: Activate the “Vision Calibration” function of the Second Intelligentdispensing machine, and recalibrate the coordinates using a standard calibration plate to ensure the synchronization accuracy between the vision module and the motion axis.
● Mechanical inspection: Tighten the screws of the X/Y/Z axis transmission mechanism, check the lubrication of the lead screw and slide rail, and add special lubricating oil; replace the worn positioning fixture to ensure that the workpiece is fixed and does not wobble.
● Table adjustment: Use a level to calibrate the worktable, keeping the error within 0.1mm/m to avoid positioning deviations caused by equipment tilting.

Figure 5. CCD vision camera
6.Leaking of the glue valve :
Problem description : When not dispensing, the glue valve continuously drips glue, causing glue waste and contamination of the workbench.
Main reasons: the back suction function is not activated or the back suction pressure is insufficient; the needle inner diameter is too small, resulting in excessive back pressure; and the seal of the glue valve is worn.
Solution
● Function settings: In the control system, enable the “back suction function” and adjust the back suction pressure to 0.02-0.05MPa to ensure that reverse suction is formed after the glue valve is closed.
● Component replacement: Replace with a needle with one of a larger inner diameter to release back pressure; inspect the valve seals, and replace with original factory sealing components if deformation or scratches are found.
● Adhesive inspection: Filter the adhesive to remove impurities and prevent impurities from getting stuck in the valve core, which could lead to seal failure.
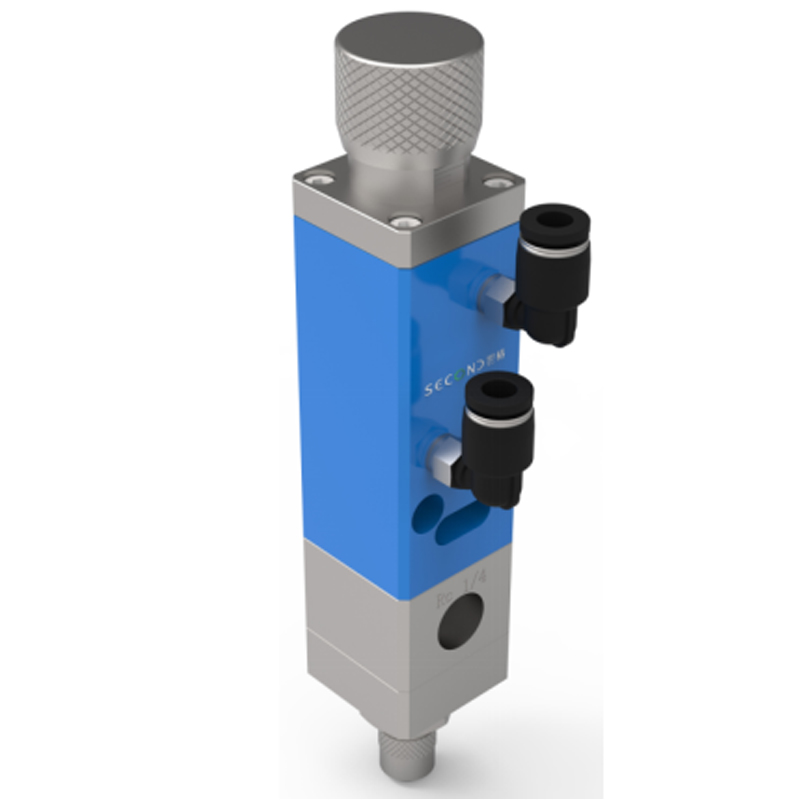
Figure 6. High-pressure suction back valve
Routine maintenance of dispensing machine:
Most malfunctions stem from improper maintenance. Proper daily and periodic maintenance of dispensing equipment can reduce the failure rate by over 70%. Considering the characteristics of dispensing equipment, the following points should be given special attention:
1.Clean the equipment surface and workbench daily to remove any adhesive residue . Confirm that the power connection is normal, the air pressure is stable at 0.5-0.7 MPa, and there are no air leaks. Start the equipment and run it idle for 1 minute to confirm that the moving shafts rotate smoothly .
2.Check the hoses for aging and the needles for wear every week. Apply special lubricating oil to the X/Y/Z axis lead screws and slide rails, and check the tension of the drive belt .
3.Perform a full system calibration monthly, including calibration of pressure, positioning accuracy, and dispensing volume . Check the tightness of electrical wiring connections and replace worn needles, seals, and other easily damaged parts.
4.Replace hydraulic oil and seals quarterly to ensure the stability of the power system;
5.When the hose is not in use for an extended period, drain the glue from the hose, turn off the power, and take dust prevention measures.
Conclusion:
Second Intelligent dispensing equipment, with its advanced control system and precise mechanical structure, provides stable dispensing solutions for various manufacturing enterprises. For common problems encountered during the dispensing process, simply pinpoint the cause and implement targeted solutions using the equipment’s specific functions to quickly restore production. For further information on Second Intelligent equipment operation techniques or troubleshooting services, please contact Second Intelligent’s official after-sales service. Their professional technical team will provide comprehensive support to make dispensing production more efficient and stable.
#back suction valve# #energy vehicles# #two component potting machine# #automatic glue dispenser# #Pressure Tank#